Top food blogs

Translate

Showing posts with label Dessert. Show all posts

Tuesday, May 27, 2014

Cream Cheese Apple Cake

Cream Cheese Apple Cake
Oven Temperature: 350 Degrees
Prep. Time: 30 Minutes
Cook Time:  1 Hour 15 Minutes
Total Time: 1 Hour 45 Minutes
There was a time when I was younger that I absolutely adored apples. I would have at least one apple every day. Then again, I would always have some sort of caramel chocolate with it. After all, who doesn't like the stellar combo of apples and caramel? Now that I'm older, I find that I have to actually crave an apple. Yes, I have weird random cravings. Lately, those random cravings have been showing up a lot more often. I was craving apples, but not in a typical Apple Pie. Of course, I just had to find a recipe that had apples, and it was a must that I bake something. You see, finding a recipe is usually what takes me forever. Believe it or not, the actual baking takes less time. Maybe it's because I'm OCD and like to obsess over researching every aspect and reading every comment. It takes a lot for me to actually try a recipe. I finally found one that satisfied me on One Perfect Bite. This blog is truly amazing. I don't link to original recipes often, but this is definitely a blog you should check out. Such thought and time are put into each and every recipe and post, it's definitely worth the time. Anyways, I read and re read the recipe and went over every detail. Then I got to work. The results, stellar. Absolutely phenomenal. Impeccable.
This apple cake is just one of a kind. The cake itself is slightly dense with the perfect crumb to it. It's moist and velvety and the apples add a beautifully soft bite. You get the slight hint of cinnamon and the richness from the cream cheese. This cake just has the most amazing texture. Try it out. It does take a little extra prep time, but the result is definitely worth it.

Ingredients:

3 Cups All-Purpose Flour
1 1/2 tsp Baking Powder
1 tsp Salt
1 tsp Cinnamon
1 Cup Butter (Softened)
12 oz. Cream Cheese (Softened)
2 1/2 Cups Granulated Sugar
4 Eggs
1 tsp Vanilla
1 1/4 lbs. Apples (Peeled and Diced)
Powdered Sugar

Directions:
Preheat oven to 350 degrees. Grease and lightly flour two (9 x 5 x 2-inch) loaf pans or a 10 Cup Tube Pan. Sift the flour, baking powder, salt, and cinnamon together. Set aside.
Put butter, cream cheese, and sugar in the bowl of a stand mixer fitted with a paddle attachment. Beat ingredients on medium-high speed until mixture is very light in color (almost white) and texture is fluffy, about 6 to 8 minutes. Scrape sides and bottom of the bowl once during the process to insure that butter is evenly incorporated. Crack eggs into a liquid measure and add vanilla. With mixer on low speed, slowly pour mixture into bowl allowing eggs to fall in one at a time. Scrape bottom and sides of bowl. Add sifted dry ingredients on low speed; stop mixing as soon as flour is incorporated. Fold apples in by hand using a stiff spatula and scrape batter into prepared pan. Place pans in the middle of the oven and bake 60-75 minutes rotating pans halfway through baking time. When cake is finished, a wooden skewer inserted in the middle should come out clean. Allow cakes to cool 15 minutes before removing from pan. Cool completely and cover with a thick dusting of powdered sugar.

Friday, March 14, 2014

Cheesecake Squares

Cheesecake Squares
Oven Temperature: 325 Degrees
Prep. Time: 20 Minutes
Cook Time: 40 Minutes
Total Time: 1 Hour
I LOVE cheesecake. As a kid, I always thought it was gross. I mean, come on, who puts cheese in cake? Us Arabs eat cheese for breakfast. But as you all know, I am super easy going when it comes to trying new food. That's how I came to love cheesecake.
When I was younger, I didn't have many friends. Personally, I preferred to do my own thing. Give me a good book and some yummy food and I could keep myself entertained for hours. Rarely did I have friends over, but when I did, it was my friend Iman. Of course, she would be bring the whole family with her (because we all come in 6 packs). Of course she would also bring some sort of dessert with her. One night, she came over and brought a strawberry swirl cheesecake with her. Nur, meet Cheesecake, Cheesecake, meet Nur.
How had I not had cheesecake before? I mean my mom's favorite restaurant (by favorite, I mean the only one she'll go to) is The Cheesecake Factory. Their specialty is cheesecake, and yet I had never tried it before. This introduction was truly a pleasure. I took one bite, and I was hooked. This wasn't even a gourmet cheesecake, it was just a plain 'ole bakery one. At that moment I knew that I had to make a cheesecake. I just had to.
Of course, my motivated eager self got up the next morning and started the journey to a cheesecake. Forget the fact that I had never seen a cheesecake pan before. I had my mom buy me all the stuff and I got to work. That cheesecake. Oh. My. God. It was horrible. Yes, horrible. Everything worked out fine, but I baked the life out of it. It was not a cheesecake, it was a hard block of cheese. I actually waited until a toothpick came out clean. And if that wasn't enough, I let it cool in the oven. Because I hadn't already dried the life out of it. Let's just say, since that day I could not look at a cheesecake again. I had nightmares. I buried myself in a hole and refused to come out. Okay, so I am a little dramatic. I didn't do that. But, I also never attempted a cheesecake again. Until now. I am proud to say that I am proud of this cheesecake. This was truly an achievement, and I would like to share it with all of you.
This cheesecake is truly a masterpiece. The crust is beautifully sandy. The graham crackers are perfectly fine with a nice coating of smooth butter. You get the hint of honey from the graham crackers, and the perfect richness from the butter. The crust is so perfectly proportioned with the amount of cheese filling. The filling is smooth, creamy, and perfectly cheesy. The decadence of the pure vanilla cuts through the heaviness of the cream cheese. The slight amount of sugar balances with the sour cream to achieve the perfect amount of sweetness. Top these little squares with any topping you want, and you have a whole new flavor profile. These squares are the perfect canvas for creativity. You can not get enough of these. Cut them small. You won't feel as bad eating the whole tray. Trust me. I know.

Ingredients:

Graham Cracker Crust
2 heaping Cups Graham Cracker Crumbs
3 tbsp Sugar
1/2 tsp Cinnamon (Optional)
3/4 Cup Butter (Melted)

Cheesecake Filling
3  8-oz. Packages Cream Cheese (Softened)
1 Cup Sugar
3 tbsp Flour
2 tsp Vanilla Extract
3 Eggs (Slightly Beaten)
16 oz. Sour Cream

Directions:
Preheat the oven to 325 degrees. Line the bottom of a 13x9 pan with parchment paper. Don't skip this. You may be tempted not to, but this will make your life easy. Do it.
Combine the graham cracker crumbs, sugar, cinnamon, and butter in a bowl. Mix until everything is evenly coated, and press into the bottom of the lined pan. Bake for 12-15 minutes, while you prepare the filling.
To prepare the filling, beat the cream cheese until smooth. Add the sour cream, vanilla, sugar, and flour. Mix well. Stir in the eggs. Don't over mix you batter. The crust should be ready by now. Take it out, and evenly pour the filling on top of it. Bake for about 40 minutes. Now here is what you need to do. Make sure that the cheesecake is till jiggly when you take it out. The cheesecake should also NOT be browned at all. As the cheesecake sets, the jiggle will go away. It's like Jello. Use your best judgment, but these 40 minutes should be just about perfect for this consistency. Start checking on it at the 34 minute mark and you should be okay. You can do this. I promise.
Once it's ready, cool it completely at room temperature. After that, wrap it up and put it in the fridge overnight. When you're ready to slice it, just pull it out using the wax paper as handles (I told you not to skip this step). It should come out cleanly. Slice it up and top it. Or you can just leave it plain. Now, eat it. Because, that's what I did. To all of it. 

Thursday, February 27, 2014

Sahlab (Middle Eastern Milk Pudding)

Sahlab (Middle Eastern Milk Pudding)
Prep. Time: 5 Minutes
Cook Time: 10 Minutes
Total: 15 Minutes
Our weather is extremely bipolar. The other day I went to class at 12:15 pm. When I went to class, it was 64 degrees. It was sunny. It was beautiful. Again, it was 64 degrees. I left class at 1:45 pm. I walked down the stairs and opened the doors to head out to the train. An immense wind hit me, and if it weren't for the fact that my backpack weighs more than I do, I would have flew. It was cold. My fingers literally were stuck in place and my nose was already numb. I looked at my phone, and it was 13 degrees. Thats right, 13 degrees. I had not even brought a jacket because I had expected it to stay warm all day. By the time I got to the train I was numb. After I got on the train and the heat hit me, and my legs began to sting. It was as if I was defrosting. Oh. My God. So now, I will carry a jacket. Even if it's 80 degrees, because you never know!
On days like this I like to cuddle up on the couch and read a book. I absolutely love reading and I usually have at least 10 books checked out at once. At least it's a good habit, right? You know what's even better than sitting next to the fireplace and reading? Sitting next to the fireplace and reading while you eat Sahlab. I am totally amazing at multitasking. Make this Sahlab, and I am sure that you as well will master the art of multitasking.
This warm pudding is a slightly sweetened and thickened milk. You get a slight flavor from the mastic, and hint of sweetness from the sugar. The cornstarch thickens this pudding just enough. The toppings just put this pudding on a whole new level. The walnut adds a nice little crunch and nuttiness to the richness of this pudding. The coconut balances the richness by adding a slightly fresh and tropical flavor. Then, you have the ground cinnamon. This adds a warmth. It makes this pudding holiday worthy, winter worthy. It adds a slight sharpness to this pudding. When you get a bite of it all you have the perfect combination of textures and flavors. This pudding is truly heaven.

Ingredients:

Sahlab
6 Cups Milk (Whole Milk)
3/4 Cup Sugar
1 Cup Room Temperature Water
1 Cup Cornstarch
1/4 tsp Ground Mastic (Optional)

Topping
Shredded Coconut
Chopped Walnuts
Ground Cinnamon

Directions:
In a sauce pot, pour the milk and sugar. Heat on medium low, being careful not to scorch the milk. Stir frequently to help the sugar dissolve. In a measuring cup, measure a cup of water. Add the cup of cornstarch and mix well. Have the ground mastic set aside and ready. Also, have 8 cups or bowls, and a ladle ready and set aside. As soon as the milk comes to a slight boil pour in the cornstarch dissolved in water into the milk. Immediately begin stirring and continue to stir for a minute or two or until you pudding thickens and boil. Turn off the heat and add the mastic. Stir it in well and ladle the pudding into the cups or bowls. Top with shredded coconut, chopped walnuts, and a sprinkle of cinnamon. Serve hot. Enjoy.

Thursday, January 30, 2014

Opera Cake

Opera Cake
Oven Temperature: 400 Degrees, 350 degrees
Prep. Time: 1 1/2 Hours
Cook Time: 40 Minutes
Total Time: 2 Hours 10 Minutes
I am a total sucker for trying new things. I love trying new food, new clothes, and most of all new recipes. For some reason, the ridiculously time consuming intricate recipes seem to appear when I've got a specific Birthday Cake request. Back in December it was one of my friends birthdays, having been the one to make a previous cake for them, the birthday girl had a specific request. She wanted a cake that combined coffee, mocha, and chocolate flavors. Of course, she had to make it a little more difficult with a request for not too much coffee. I was up for the challenge. I spend all night looking up recipes on Pintrest and trying to think of how I could combine all these flavors. Then, I hit the jackpot. I found a link to what was called an opera cake. It looked beautiful, time consuming, difficult, and delicious. That was the perfect combination for me. I pinned the recipe and woke up bright and early the next morning to start working on my masterpiece.
Now the cake may seem a little difficult, but I promise, if you follow my detailed directions you will be fine. Also, when I began to layer the cake and cream I used a cheesecake pan. Since the cheesecake pan has a clasp to separate the bottom from the sides, it makes it perfect for layering this cake. I used a pan the same size as the ones I had baked my cake layers in. This held everything together perfectly and kept my ganache from dripping as the cake set. I would also recommend you place a parchment circle in the bottom of the cheesecake pan, as well all around the sides. My parchment sides were about two inches taller then the sides of the cheesecake pan, which is perfect  because this cake gets pretty tall. Just follow my directions by the letter, and read the whole thing before stating, and I promise that you too will accomplish this amazing to die for cake!
Of course now you're curious to how this cake tastes. I am lost on how to even describe it. The cake layers have a nutty flavor with a slight cookie like texture. The parts soaked in the coffee syrup are moist and amazingly sweet. Then you hit the buttercream. WOW. That buttercream. Its slightly flavored with a mocha paste and has the most delicate color. Add that to the ridiculously sweet chocolate ganache, and the crumbly cake and you have all these amazing flavors melded into a gorgeous and tasty cake. You need to try this. You must. The world will thank you. As will your taste buds.

Ingredients:

Joconde (The Cake)
200 g Finely Ground Almond (I used a food processor)
100 g Caster Sugar (Just Pulse Granulated Sugar in the food processor for 30 sec.)
6 Eggs
50 g Butter (Melted)
60 g All Purpose Four
115 g Egg Whites (3 or 4 Egg Whites depending on size, I used 4)
55 g Caster Sugar

Coffee Syrup
100 ml Coffee or 100 ml Hot Water with 15 g Instant Coffee
100 g Sugar (Personally I would leave out next time.)

Mocha Buttercream
100 g Egg Whites (2 or 3 Egg Whites, I used 3)
200 g Sugar
300 g Unsalted Butter (CUBED and CHILLED)
1/2 tbsp Mocha Paste (1 tbsp Instant Coffee, 1 tbsp Cocoa, 1/2 tbsp Water MIXED)
1 tsp Coffee Oil or Some sort of Extract

Chocolate Ganache
200 g Dark Chocolate
200 g Milk Chocolate
75 g Unsalted Butter
250 ml Heavy Cream

Chocolate Drizzle
1/4 Cup Chocolate
1 tsp Vegetable Shortening

Directions:
Preheat the oven to 400 degrees. Prepare two 8 inch pan by placing a parchment circle in the bottom and buttering and flouring the sides. In a large bowl combine the ground almond, sugar, and 3 whole eggs. Beat at medium speed for 10 minutes. Then beat in one egg at a time from the remaining three eggs. Beat each one until combined. After you add the last egg, beat for another 10 minutes. In another bowl stir in 1/4 cup of the almond mixture you just prepared with the melted butter. Set this mixture aside. Add the flour to the remaining almond mixture and combine. Set aside.
In another bowl beat the egg whites till foamy and then gradually add the 55 g caster sugar until soft peaks form. Combine both of the almond mixtures and then take 1/3 of the egg white mixture and gently mix it into the almond mixture to lighten the batter. After you have lightened the batter pour the whole thing into the rest of the egg whites and gently fold it all together! Do not mix or the batter will deflate! Seperate into two pans. Make sure they are even. Place the pans in the oven and immediatly decrease the temperature to 350 degrees. Bake for twenty minutes. Cool the cakes in the pans until they are completly cool. Take the cakes out of the pan, remove the parchment paper and slice each cake so you end up with four layers.
Now you need to prepare each of the layers. Make the coffee syrup by mixing the hot water with the instant coffee and then disolving the sugar. You can also just use a strong espresso and mix in the sugar. Set this aside to cool.
For the buttercream you want to use a double boiler. You can just use a pot with water and place a heatproof bowl on top. Make sure the water doesn't touch the bottom of the bowl or you will scramble the eggs. Place the egg whites and caster sugar and using a beater beat at the slowest speed while heating the mixture. You can also whisk this mixture by hand. You want the sugar to dissolve in the egg whites. You can use a thermometer and just heat the mixture to 65 degrees Celsius, but lets be honest, not many of us have a thermometer. I know I don't. I just check by rubbing the mixture between my fingers to see if there are any sugar grains left. After the sugar is dissolved, pour this mixture into a clean cool bowl and beat at high speed until the mixture turns glossy. Now, take out the cubed butter from the fridge, and while beating, add one cube of butter at a time. Your mixture might start to seperate or deflate but it will come together when you're done. Beat well until the cream is light and fluffy. Now add in the mocha paste and coffee oil and 50 ml of the coffee syrup. Mix well.
Last but not least, you need to prepare the ganache.
Chop the chocoalate into small pieces. Heat the cream until its warm and then pour over the chocolate. Let it sit for five minutes and then mix well. Add the butter and continue to mix until everything is combined and smooth. Set aside until it thickens a little.

Assembling the Cake:
Set your prepared pan on a flat table. Place one of the cake layers down. Make sure the layer is upside down, meaning that the top of the cake is touching the bottom of the pan. Brush with the coffee syrup until moist. Spread half  of the buttercream. Cover with another layer of cake (always upside down). Again, brush with coffee syrup. Pour over half of the chocolate ganache. Layer with another cake and brush it with the coffee syrup. Spread the other half of the buttercream. Place the last layer of cake and brush with the rest of the syrup. Pour the rest of the ganache and spread nicely. Place in the refrigerator until set and then drizzle with chocolate. When ready to serve, release the cake from the pan and remove the parchment paper. Set in a plate and slice with a hot knife. Wipe the knife before each slice to preserve the layering. Enjoy. Store refrigerated for up to three days! NO MORE!
Enjoy!

Friday, January 24, 2014

Mini Fruit Tartlets

Mini Fruit Tartlets
Oven Temperature: 400 Degrees
Prep. Time: 1 Hour
Cook Time: 10 Minutes
Total: 1 Hour 10 Minutes
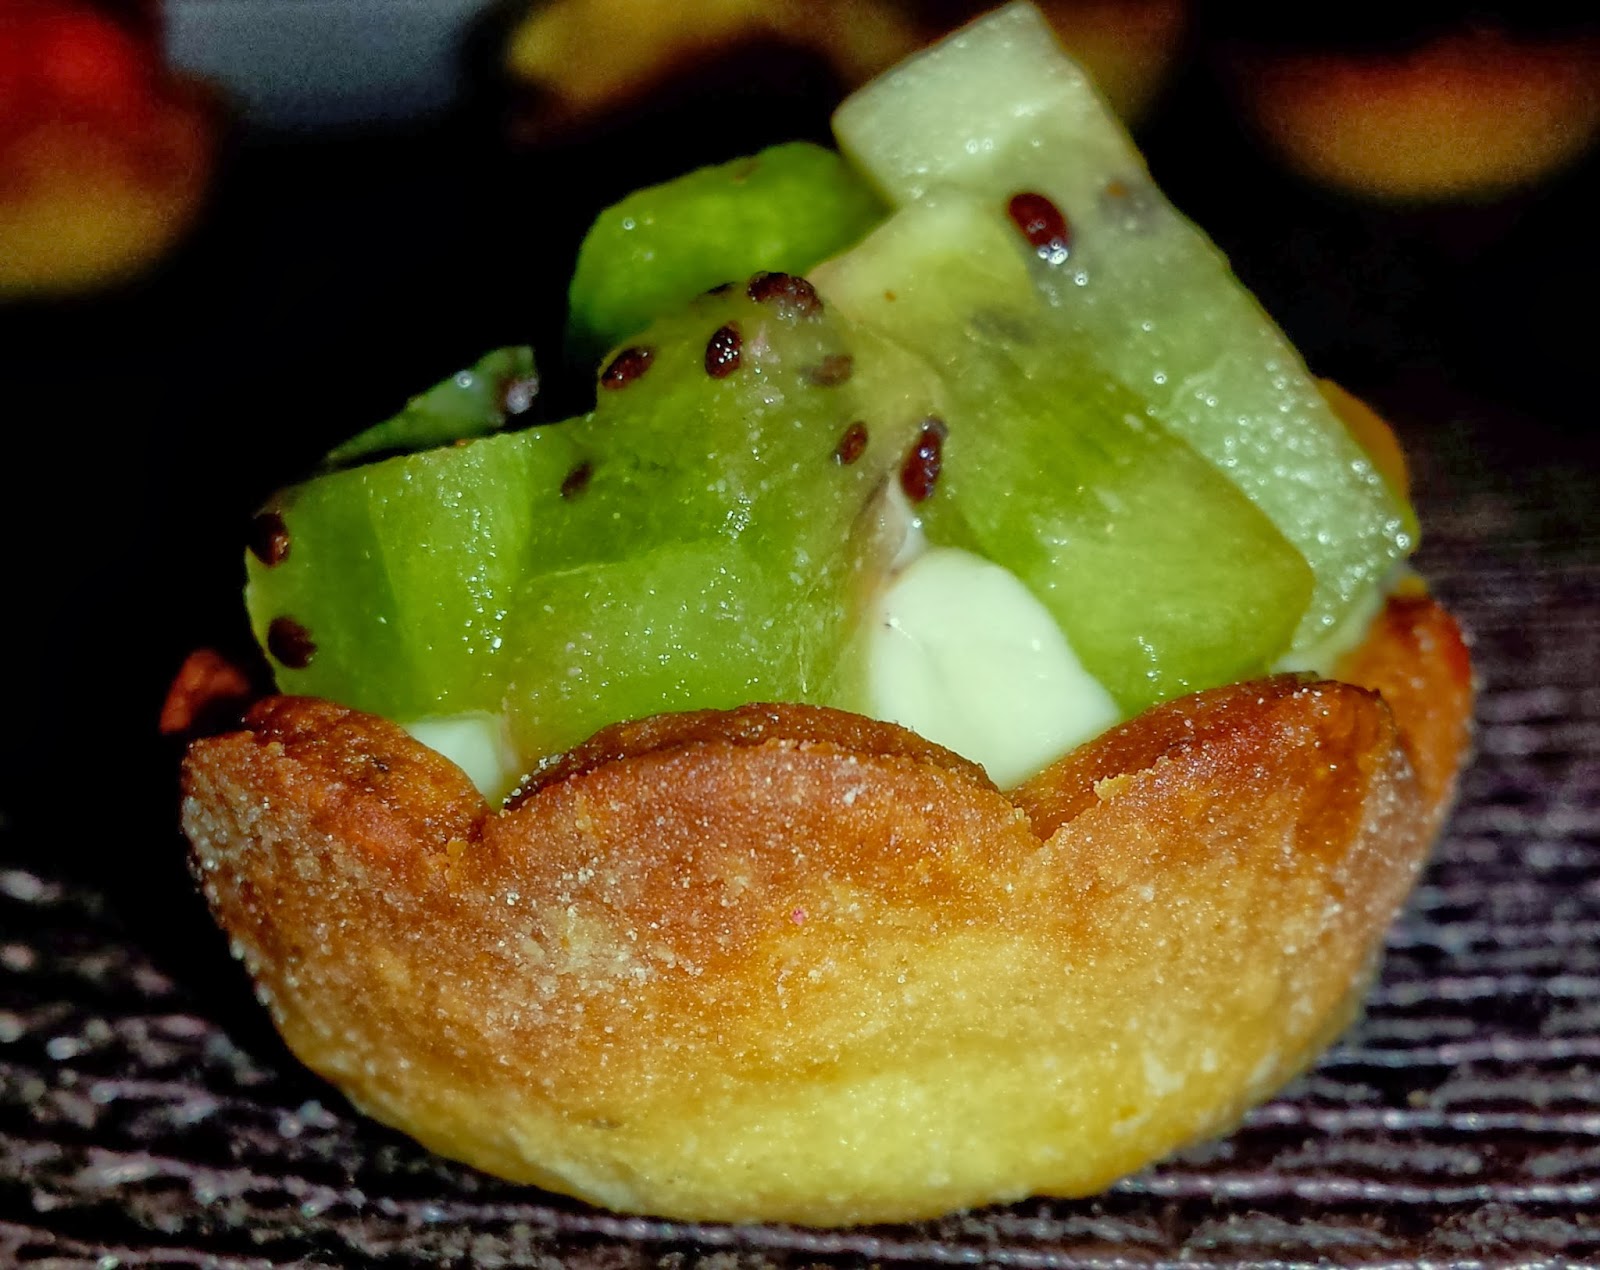
We have a family friend that brings a fruit tart each time she comes over. The presentation of it is just stunning, but I have never been fond of the tart itself because of the fact that it has custard. I never actually tried it, I just assumed it was gross. Boy was I wrong! One night we were invited to my uncles for dinner, and my monstrous siblings had devoured all the french silk pie. You all know I have an insane sweet tooth, so I was kinda forced to eat the fruit tart. It was either that or no dessert for me. I ate every last bite of it, each bite testing better and better. I was inspired. I knew I had to replicate this myself; of course it had to taste better and it had to be in the mini form, because anything miniature is just better. So I did. The finished tartlets: Phenomenal.
The crust has a cute little rim I achieved with a flower cookie cutter. The crust itself is flaky with the perfect crisp to it. The ground pistachio adds a bit of color and a nutty undertone. The custard is creamy and rich. You get the slight hint of vanilla and the citrus from the orange zest. It all balances so well. The fruit itself is great and the apricot glaze not only adds a shine, but also a hint of sweetness. These bite size tartlets are perfect, because you get everything at once. The custard to crust ratio is perfect and the glazed fruit adds a subtle freshness to this surprisingly light dessert. The textures balance each other so well. You get the flakiness of the crust, the crunch of the pistachio, the creaminess of the custard, and the bite of the fruit. These are definitely worth the time. Although they disappear quickly, their flavor never leaves your mind. You will be hooked. I am. 

Ingredients:

Tart Shells
1 1/3 Cups All Purpose Flour
1/4 Cup Finely Ground Pistachios
1/4 Cup Sugar
1 Stick Butter (Chilled)
1 Egg
Pinch of Salt

For Baking
PIE WEIGHTS or BEANS
Foil

Orange Vanilla Infused Custard
1 Cup Milk
2 Egg Yolks
3 tbsp Sugar
1 1/2 tbsp Cornstarch
Zest of half an orange
1/2 tbsp Vanilla Extract
1/2 tbsp Butter
Pinch of Salt

Fruit Topping
3 Strawberries (Diced)
1 Kiwi (Diced)
20 Blackberries (Split in Half)
3 Slices of Pineapple (Diced)

Glaze
1 tsp Apricot Jam (Or any other light jam)
1 tsp water
Directions:
Begin by making the crust as it needs to chill before you can roll it out. In a food processor, place the ground pistachio, flour, salt, and sugar. Pulse to mix together. With the food processor running, add the butter in cubes from the top of the food processor. Allow it to mix until you get fine grains. Now, take off the lid and crack the egg. Put the lid back on and run the food processor until it all combines and you have large crumbs. Dump the crumbs on a clean counter and smash them all together to achieve a ball of dough. Wrap in plastic wrap and place in the fridge. 
Next, you make the custard. Pour the milk into a small saucepan and heat on low heat till boils. As the milk heats grab another bowl and crack the eggs. Separate the yolks and throw them in bowl. You don't need the whites. Either discard or save for another use. To the yolks, add the sugar, cornstarch, orange zest, vanilla extract, and salt. Whisk well until you have a smooth mixture. The milk should be boiling by now. Slowly temper the yolks by adding a small spoon of hot milk while whisking the eggs vigorously. With one hand whisk vigorously, and with the other pour small amounts of the milk. This will keep your yolks from scrambling. After this is all incorporated pour it all into the saucepan and whisk continuously until the custard thickens. Remove from heat and pour into a clean bowl. Whisk in the butter until it melts into the hot custard. This will put your custard over the top! After all, a little butter makes anything better!
Leave the whisk in the bowl. You need to put the bowl in an ice bath till it cools completely. Mix every once in a while to keep a layer from forming on top of the custard. 
Now you need to make your tartlets. I used two mini muffin pans. Preheat your oven to 400 degrees and clear a table or counter for the rolling. Dust it with a bunch of flour. Split the dough in two and pat into a circle. Turn over the dough to dust both sides with a generous amount of flour. Believe me, this will keep your dough from breaking and sticking. Roll the dough to a 1/4 inch thickness flipping it every once in a while so it doesn't stick. You can cut them into circles with a cup pr biscuit cutter, but I used a flower cookie cutter because of the crimped edges it gave the tartlets. Spray the pan and place the crust into the tins pressing gently to you have a little cup. Continue doing this until you finish the dough. I ended up with 40 tartlets. You need to place pie weights or beans in the tartlets so the middle doesn't inflate in the oven. I cut little pieces of foil and put 4 beans in each placing them in the center of each tart. If you have kids, this a great little fun way they can help out. Bake the tartlets for about 8 minutes, or until you see the top edges start to become a golden brown. Remove them from the oven and take the foil bowls out immediately so they don't stick to the inside of the tart shell. Remove the tartlets with a spoon and place them on a cooling rack. 
As the tartlets cool dice all your fruit. You can use any fruit you have on hand, this is just the fruit that I had available the day I made these. Smaller fruits like blueberries probably won't need to be cut. 
Assemble the tartlets by placing 3/4 of a tsp of custard into each one. You can know arrange the fruit any way you want. Originally, I wanted to put some of each of the fruits, but I didn't realize how small these tartlets are. In the end I just toppled each tartlet with a different fruit. For the glaze I mixed a tsp of apricot jam with a tsp of water and microwaved it for 15 seconds. I used a pastry brush to glaze each tartlet. After that I just threw them in the fridge. You can store them in a closed Tupperware for up to three days, but I don't think they'll even last that long. Mine disappeared within the hour. I'm sure yours will as well. Enjoy these little shells of goodness!

Wednesday, January 22, 2014

Oreo Truffles

Oreo Truffles
Prep Time: 30 Minutes
Total Time: 30 Minutes
As you all already know, I have got an insane obsession with cookies. Anything in cookie form is just amazing taken to a whole new level. Of course, I have learned that I have to limit my sweet intake because it has gotten out of control lately. This means I no longer buy cookies. You see, I have no self discipline. If I buy a package of cookies, I will eat the whole package. Now, I don't mean that I'll eventually eat the whole package; I mean that if you give me a package of cookies, I am completely willing to destroy the whole thing in a matter of minutes. No joke. The joy I get as I devour cookies . . . You can only imagine my excitement when I realized that we had a whole sale package of Oreos sitting at the top of the pantry. They were just calling my name. I got the brilliant idea of making truffles. I have a few friends that make these amazing little mashed up Oreo and cheese balls that they call truffle. OH MY GOD are they amazing. If I ever go into diabetic shock, blame them. Now, I never actually expected them to be easy to make so I tried them. The first time I made them I used lollipop sticks and made them cake pop style. I also used white candy coating. They were a mess. I put way to much cream cheese (The Paula Deen in me) and they just wouldn't hold together. When I dipped them, they fell of the stick and I ended up with this goopey mess. Don't get me wrong, they were amazing flavor wise, but not so much presentation wise. In fact, they were just ugly. They looked like those Pintrest gone wrong pictures. I left them alone for awhile, and a few days a go I decided to give it another shot. I weighed the cream cheese and pulverized the life out of the Oreos. I made sure to freeze them for a little so the dough was easier to work with and I just used plain old chocolate chips for the coating. The results: ToDieForAmazingLittleBundlesOfJoy. They were just a pure work of art. You take a bite and the thin chocolate coating has a nice little bite to it. You get the perfect balance between the milk chocolate and the thin dark chocolate drizzle. Then, you taste the inside. The Oreo is just a perfect almost creamy consistency. Its rich, its creamy, and a beautiful balance. One is never enough. You will eat all of them. You will get sick of them, but you will still get up and make more when you see the Tupperware in the fridge quickly emptying out. Take a little extra time and make 'em pretty. Pack 'em up and take 'em as a gift. A marriage proposal is definitely something that will follow. These are to die for. I'm dead serious. No pun intended.

Ingredients:

17 oz Oreos (Usually a package, DON'T USE DOUBLE STUFF)
4 oz Cream Cheese (Decrease to 3 oz if using double stuff)
1 Cup Milk Chocolate Chips (or Use any chocolate you like)
1/4 Cup Dark Chocolate Chips (You can use any chocolate)
1 tbsp and 1 tsp Vegetable Shortening or Vegetable Oil

Directions:
Smash the life out of the Oreos. Personally, I don't like leaving any texture in them, so I throw them in the food processor until I get a fine sand. Dump them in with the cream cheese. To make it easier, soften it for 15 seconds in the microwave. Now, do not use a spoon for this step. Get your hands dirty. Mix the Oreos with the cream cheese until you have to no white spots of cheese visible. You want a cookie dough like texture.
Throw the bowl into the freezer for 15 minutes until the dough is little easier to work with. For this next step I find it easier to use a cutting board and knife.
Take the dough and roll it into rectangle or log like circle (makes perfect sense). Cut the dough in half. Then cut each half in half. You should have 4 pieces now. Cut each one in half and then each one of those in half again. You should end up with 16 truffles. Roll them into nice little balls and put them on tray lined with wax paper. Throw them in the freezer for like 15 minutes, until they are easier to dip in chocolate. Meanwhile, melt the chocolate with the veggie shortening until you have a thin consistency. Take the truffles out and roll them nicely as they will flatten a little on the tray. Dump each individual one into the chocolate and use a spoon to take it out and let the excess drip off. Put them on the tray and stick them in the freezer so the chocolate hardens. Melt the dark chocolate, put it in a Ziploc baggie, and snip a tiny corner off. Drizzle it on the truffles and place in the freezer till it hardens enough to take off the wax paper and put in individual mini muffin cups. Store in a closed Tupperware in the fridge for up to a week - if they last that long.

Friday, November 15, 2013

Tiramisu Cupcakes

Tiramisu Cupcakes . . .
Oven Temperature: 325 Degrees
Prep. Time: 1 hour
Cook Time: 20 minutes
Total: 1 hour 20 minutes
Tiramisu is known as a classic and decadent dessert. You are bound to find some "Homemade" version of it at probably any Italian restaurant you go to. Being muslim, I cannot drink alcohol. Therefore, I have never actually gotten to taste tiramisu because it usually has some form of alcohol in it. Now, I know I could have made it myself, but I am the kind of person that likes to make everything from scratch. I didn't really make it if I bought the cookies, bought the coffee, and bought the cream. Right? So, I never made it, because I am weird like that. Now you can only imagine my excitement when I got a request for tiramisu cupcakes. This was coming from an addict, from someone that loved tiramisu, from someone that had tried it in all its forms, and from someone that I looked up to. This meant that they're opinion mattered to me. I had to perfect them, I just had to.
These cupcakes are just jawdroppingly beyond amazing. They are that  good. The cupcakes themselves are fluffy and dense in the weirdest way. They are amazingly moist and have like an almost crispy sweet edging. Combine that with espresso syrup that they are lovingly and delicately brushed with and you have this ridiculous coffee, sugary, cakey concoction. Then you have the frosting. That frosting. Oh. My. God. 
The mascarpone itself is a rich creamy cheese. Now, at $6.00 for 8 oz of it, my frosting had better taste damn good. The frosting is airy, rich, creamy, and slightly sweet. The first bite is different. You want to take another one. You take the second bite, and the frosting hits the crispy edges of the cupcake, the sweetness of the coffee, and the actual crumbs within the cake, and you are just in heaven. Literally. Enough said.
This recipe is pretty straightforward one. However, it is also one that requires extreme attention to detail. I am pretty OCD about details, so the recipe should be easy to follow, and you should get pretty decent results if you follow it word by word. This is definitely a recipe that I would not use substitutions in—unless I stated a specific substitution within the recipe. Enjoy!

Ingredients:

Cake
1 1/4 Cups Cake Flour (*See Substitute below)
3/4 tsp Baking Powder
1/2 tsp Salt
1/4 Cup Milk
1 tbsp Pure Vanilla Extract or 1 Vanilla Bean Split lengthwise (Scraped)
4 tbsp Unsalted Butter (Cubed and Softened)
3 Whole Eggs AND 3 Egg Yolks
1 Cup Granulated Sugar

Coffee Syrup
1/2 Cup Espresso or DARK Coffee (HOT)
1/4 Cup Granulated Sugar

Frosting
1 Cup Heavy Cream
8 oz Mascarpone Cheese
1/2 Cup Powdered Sugar (Sifted)

Decoration
Unsweetened Cocoa Powder for Dusting

*Substitutions
*For 1 1/4 Cups Cake Flour:
Measure 1 Cup Flour and REMOVE 2 tbsp Flour. Add 2 tbsp Cornstarch.
Measure 1/4 Cup Flour and REMOVE 1/2 tbsp Flour . Add 1/2 tbsp Cornstarch.

Directions:
Preheat your oven to 325 degrees. Line your muffin tins with paper liners. This recipe will make exactly 18 cupcakes. After you line the tins, spray the top, that way the cap of the cupcake doesn't stick when the rise during baking. 
Sift your cake flour, baking powder, and salt. Set aside. In a small pot, heat your milk, and vanilla extract (Or Scraping with the pods, you'll have to strain the mixture after though). Heat through, but DON'T boil. When bubbles form around the edges, remove from heat. If you used vanilla beans, remove the pod and strain. If not, skip this step. 
Now, you should set up a double boiler for the next part. Make sure the bowl is large enough to fit all the ingredients as they will expand. In the bowl you are going to use, whisk together the whole eggs, egg yolks, and the sugar. I used an electric mixer for this step. Now, place this bowl over the pot of water. Turn on the heat and allow the water to boil. Make sure to whisk this mixture continuously by hand for about 4-6 minutes. You want the sugar to dissolve and for the mixture to be warm. Remove the bowl from the heat. Now, using an electric mixer, whisk this on high speed until the mixture is thick, pale, and yellow. You want it to be able to hold a ribbon across the surface for a few seconds when the whisk is lifted. 
Next, you are going to fold in the sifted flour mixture. You want to fold it in three separate batches so your batter doesn't deflate. Now, take about a half cup of batter and mix it into the milk mixture in order to thicken the liquid for easy folding. Now fold the milk mixture into the rest of the batter. You just want to combine the ingredients. 
Next, evenly pour the batter into the cupcake tins. As I said before, you should get exactly 18 cupcakes. You want to rotate the pans halfway through baking for even baking. Bake until the edges are light golden brown, which is about 20 minutes. A toothpick should come out clean. Place the cupcake tins on wire racks until they are completely cool. You want to leave the cupcakes to cool completely before removing from the tins. 
To make the syrup, mix in the coffee and sugar and set aside to cool. 
When the cupcakes have cooled, brush the tops with syrup. I take a pastry brush and dip it in the syrup, brush the cupcake, and then repeat for each of the cupcakes. Then you repeat the process until you are out of syrup. This way they have time to absorb, and they are all evenly soaked. They may drip a little, but I assure you this amount of syrup is perfect if you follow these steps. Don't try to just put even tsp's because then they wont absorb it all and they will drip. If you do it like this, they will be perfectly moist. They may drip a little, but these cupcakes are so fluffy, that I guarantee you they will absorb all of it. 
While the cupcakes settle a little, make the frosting. You want to use this frosting immediately  so don't make it until you need it. In a small bowl whisk the whipping cream till stiff peaks form. Don't over whip or it will be grainy. In another bowl, whisk together your mascarpone cheese and powdered sugar until smooth. Now slowly and gently fold in the whipping cream into the mascarpone mixture. 
Using a sandwich or freezer bag, pipe the frosting onto the cupcakes. Don't dust with cocoa until before serving. If you are not serving till the next day, just wrap and place them in the refrigerator. Allow them to come to room temperature for about an hour before serving. Dust with cocoa powder. Enjoy! 

Tuesday, October 22, 2013

Molten Lava Cakes . . . YUM!

Molten Lava Cakes
Oven Temperature: 400 Degrees
Prep. Time: 15 minutes
Cook Time: 11-14 minutes
Total:  26-29 minutes
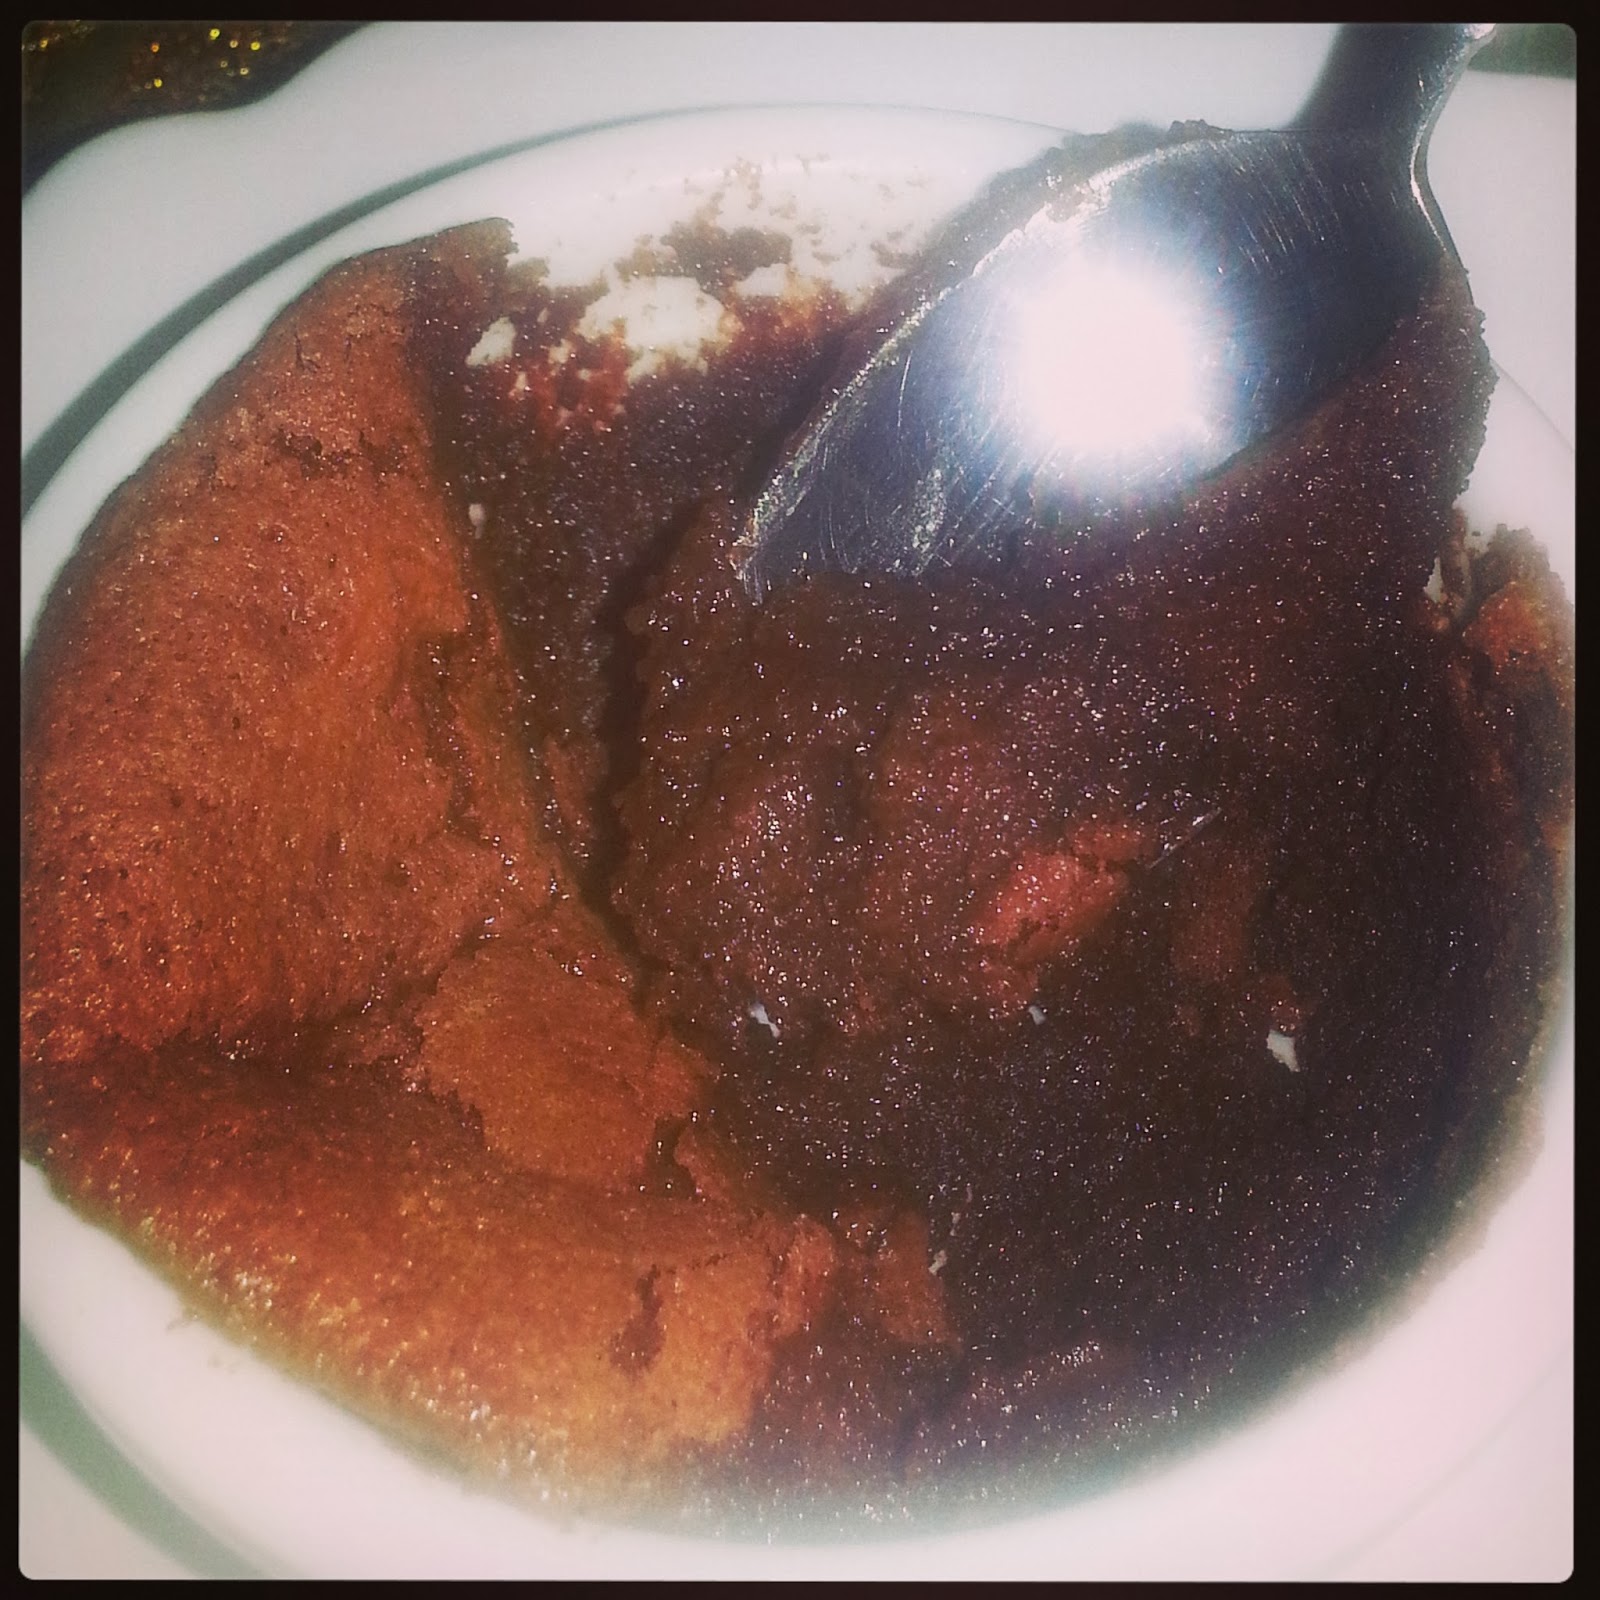
I cannot believe that I have yet to post a Lava Cake recipe. I am still shocked that I have not posted this amazingly easy recipe. Oh MY GOD! As you all know, I have a really bad chocolate addiction. This is the one cake that will completely satisfy that craving. A few years back, I went to Chili's. For dessert, I ordered a Molten Chocolate Cake. Little did I know that the minute I dug my spoon into this warm chocolate cake, it would pour out a river of warm chocolate gooeyness. That is the minute my life changed. I never knew that so many amazing flavors and textures could be held in this small little cake. My life had been corrupted forever. I NEEDED to know how to  make this cake. I just had to know. I spend days and days researching a molten cake recipe with consistently failed results. Either the whole cake would be too firm, or way too runny. Finally, I came across an amazing website with an AMAZING recipe. I was also able to watch a video with specific directions on how to make this cake. I made it once, and I was hooked. This is by far the best cake I have ever made. You will make it, and you will fall in love. Make it for someone you love, because I guarantee you a marriage proposal when you do. It's THAT GOOD!
This cake is brownie like on the outside. DId your spoon into this perfectly crispy exterior, and you will be greeted with a fluffy whipped mousse like chocolatey interior. It will be perfectly plump, amazingly light, and delectably rich in chocolate, with the absolute perfect amount of sweetness. Plop some whipped cream or Ice Cream on the top, and you have got a sinfully forbidden dessert. Try this cake. You will love it just as much as I do, if not more. Like I said, It's THAT GOOD.

Here are a few tips to making this cake:
  • When melting the chocolate, use a double boiler to prevent burning it.
  • Make sure that when you separate the egg yolks from the whites, to not get ANY yolk in the whites, or they will not whip correctly! Here is a great video on how to separate eggs. 
  • If you don't have Cream of Tartar, you can use a dash of salt instead. Don't go grocery shopping just to get it!
  • When beating the egg yolks with the sugar, I found that a paddle attachment works better, but you can use a whisk, however, ALWAY use a whisk to beat the egg whites.
  • Before beating the egg whites, make sure you bowl is CLEAN and VERY DRY. Also, put it in the freezer for a few minutes before using it. A warm bowl will NOT allow your whites to expand correctly. 
  • In order to allow your whites to expand correctly, beat them on medium speed till foamy, then add the Cream of Tartar or Salt. After that, beat them on medium speed till soft peaks form, and the add the sugar VERY slowly as beating, until Stiff peaks form. If you over beat the eggs, they will deflate. Here is a video that demonstrates how whip egg whites correctly. 
  • DO NOT pour your sugar on your egg yolks if you aren't going to beat immediately. If the sugar  is left to sit on the yolks, they will scramble. 

Ingredients:

1/2 Cup Unsalted Butter (Cubed)
6 oz. Chopped  Semisweet Chocolate OR 1 Cup Semi Sweet Chocolate Chips
3 Eggs (Separated)
1/3 Cup Granulated White Sugar
1 tsp. Pure Vanilla Extract
1/8 tsp Cream of Tartar OR Salt
1 tbsp Granulated White Sugar

Directions:
Begin by melting the chocolate and butter in a double boiler. I personally think it's a waste of money to buy one, so I use a steel or glass mixing bowl that fits inside a pot, where it will sit perfectly on the top and not touch the bottom. Fill the pot with about an inch of water, where it won't touch the bowl after you set it on the pot. Put the chocolate and the butter in the mixing bowl, without getting any water on them because the chocolate WILL seize. Turn on the heat, and allow the heat of the water boiling underneath the bowl to melt your chocolate and butter. Mix it occasionally until it is all melted and incorporated. You do not want to heat the chocolate, just melt it. After the chocolate is melted, take the bowl out of the pot and set it aside to allow the chocolate to come to room temperature so it wont scramble your eggs when you add it to the rest of your mixture.
As the chocolate cools, beat the egg yolks with the 1/3 cup of sugar. Beat until the mixture is pale, and when you lift the beaters it should fall back down in a nice ribbon. Beat in the vanilla. With the mixer on low, add the melted chocolate/butter mixture. Mix just to incorporate. 
In a clean, DRY, COLD bowl pour the egg whites and beat with a whisk attachment on medium speed. Beat until frothy. Add the Cream of Tartar OR Salt and keep beating on medium speed until soft peaks form. After the soft peaks form, slowly and gradually add the 1 tbsp of sugar while the mixer is still on medium speed. Keep whipping the egg whites until stiff peaks form. When you take out the whisk and flip it ride side up, the peak of whipped eggs should stay stiff and pointing up. If it falls, then stiff peaks have not formed yet. DO NOT over beat the whites. If you do so, they will deflate and liquify again. 
Take a small amount of the whipped egg whites and mix it into the yolk/chocolate mixture. This should lighten the mixture enough to allow you to fold in the rest of the whipped whites easily. Now, slowly fold in half of the remaining whipped whites. Gently fold them in so you incorporate them without deflating them. Fold in the rest of the whites and then evenly pour the mixture into four buttered and floured ramekins. Place on a cookie sheet and place them on the center rack in the oven. Bake for EXACTLY 11 minutes. If you bake them longer, they will cook all the way through, and then they will no longer be lava cakes. Remove the cookie sheet from the oven and serve. You do not flip them out! Be careful as they will be hot. Serve 'em with some cream, some ice cream or just plain on their own: my personal favorite.

*NOTE: You can make these ahead of time and just cover them and place them in the fridge. When ready to bake, just preheat the oven and bake for 14 minutes.

ENJOY!


Tuesday, October 01, 2013

Reese's Chocolate Peanut Butter Cupcakes

Reese's Chocolate Peanut Butter Cupcakes!
Oven Temperature: 350 Degrees
Prep. Time: 1 1/2 hours
Cook Time: 30 minutes
Total: 2 hours
I have a really bad addiction to chocolate. It's gotten to the point where I cannot buy a bag and leave it in my room, because I will eat it. ALL OF IT. I have no discipline. Of course, the fact that I don't gain weight doesn't make things better. Since there are no severe consequences to eating the bag, I really don't care, and it is HORRIBLE. So, I will not buy a bag. If I am depressed, I buy a few hundred chocolate bars, and eat them all. Other than that, even my mother won't buy it. Of course, that doesn't stop me from going to school and buying chocolate from the little no-gas gas station. Sometimes, it'll make it home and in rare cases, till the next day. However, most of the time I'm throwing out the wrapper as I leave the little store. So, my addiction may be bad, but the first step to beating an addiction is admitting that you have a problem. I have a problem. I know I do. I am working on it. I have gotten better, and the best solution I have found is to bake for others. The best feeling in the world is make something and watch someone eat it. That face they make when they taste it, it's just beautiful. They look at you as if you just put the world into their hands. Their face gets this look, a look saying oh.my.god.you.are.the.best.person.in.the.whole.entire.world.and.right.now.I.just.LOVE.YOU! They finish it, and then they are just drugged with an amazing flavor that they just don't want to leave their mouth. That is what happened when I made these cupcakes. That is exactly what happened, because that look was on my face.
I love this chocolate cake recipe. It's rich, it's bitter, and it's moist. I am also obsessed with peanut butter. So imagine my excitement when I found out about Reese's peanut butter cups. Chocolate and peanut butter just put a smile on my face. THen, you have the chocolate mousse on top. Chocolate, Peanut Butter, more Chocolate, more Peanut Butter, and more Chocolate and Peanut Butter. I am in heaven, and after you make these dreadfully amazingly tasty cupcakes, you will be as well.

Ingredients:

Cupcakes
2 Cups Sugar
3/4 Cup Cocoa
1 1/2 tsp Baking Soda
2 Eggs
1/2 Cup Vegetable Oil
1 Cup Boiling Coffee (or Water)
1 3/4 Cups Flour
1 1/2 tsp Baking Powder
1 tsp Salt
1 Cup Milk
2 tsp Vanilla Extract

Filling
1 Cup Creamy Peanut Butter
1/2 Cup Heavy Whipping Cream PREPARED or 2/3 Cups Prepared Cream (Cool Whip)

Chocolate Mousse Frosting
1 15 oz. Can Sweetened Condensed Milk
1 8 oz. Package Cool Whip
1/2 Cup Sour Cream
1 1/2 Cups Chocolate Chips
Milk (Optional)

Topping
Mini Reese's Peanut Butter Cups

Directions:
Begin by making the frosting. On a double boiler, melt the chocolate chips. Allow them to cool to room temperature. Using a mixer, whip the sweetened condensed milk with the cooled melted chocolate. You want a smooth mixture. If the chocolate isn't cooled, it will curdle with the condensed milk. Now, add the cool whip and sour cream. Whip well. Add milk if you want to thin the mousse out slightly or if you feel it is too stiff. You can always add less chocolate if you do not want it as sweet. Set in the refrigerator until needed.
Preheat the oven to 350 degrees (325 if convection). In a bowl, whisk together the sugar, flour, cocoa, baking powder, baking soda, and salt. Add the eggs, milk, oil, and vanilla and beat well. Now, stir in the Boiling coffee (or water). Mix just until incorporated. The batter WILL BE THIN. I usually pour the batter into a large measuring cup in order to easily pour it into the cupcake pan. Line 2 cupcake pans with 12 liners each. Spray the top of the cupcake pan so when they rise they don't stick to the top. Now, evenly pour the batter into the 24 cups. You should have enough to fill each one 2/3's of the way. Place the pans on the center rack in the oven and set a timer for 27 minutes. Bake until a toothpick comes out clean. Immediately transfer to a cooling rack until completely cool.
With a mixer, cream the peanut butter and slowly add the prepared cream. Beat well to incorporate into a Peanut Butter Cream.
After the cupcakes have cooled completely, fill them with the peanut butter cream by inserting the tip on a piping bag midway into the cupcake, squeezing, and releasing. This video is a great tutorial on how to do that. After all your cupcakes are filled, frost with the chocolate mousse frosting. I frost the cupcakes pretty generously and usually still have a little mousse left over. After you finish frosting them, you can just decorate them with a mini reese's or you can crush some to sprinkle on top as well. I did both. The mousse holds well, so they won't melt all over the place. However, these do need to be refrigerated so they don't go bad. Enjoy!


Sunday, September 01, 2013

Cinnamon Swirl Crumb Coffee Cake

Cinnamon Crumb Coffee Cake

Oven Temperature: 350 Degrees
Prep. Time: 20 minutes
Cook Time: 55 minutes
Total: 1 hour 15 minutes
I love my coffee. When I was a kid I remember my dad making a pot of coffee and pouring a cup. He would drink a few sips of it hot and eventually get distracted reading the newspaper. His coffee would get cold, and he would ask me to dump it in the sink and pour him a fresh cup. I loved being trusted with the hot pot of coffee. It made me feel like a big girl. He would then give me a sip of his coffee and tell me, "Only one sip, or you'll be a shortie like your mother." Of course, at 5'9 my mother is not the short one. As the years passed by, I graduated from the tiny sips to tiny little cups of coffee. When I hit 5'8 in the 8th grade, my dad decided I could have whatever coffee I wanted. Of course, that is because I outgrew him in height and he absolutely hated it. You can say that I am probably addicted to coffee. I drink it black. The aroma of a good cup of coffee just makes you want to drink it black. Why should you take away from the delicately bold flavor by drowning it in creamers and various unspeakable amounts of sugar? Black is the way to go, I tell you. And of course, when you give me a cup of coffee, I will ask for a slice of coffee cake to go with it. After you give me a slice of coffee cake, I will remember there is a whole cake in the kitchen. I will find the cake. I will eat the cake. I will enjoy the cake.
The batter to this cake is a slightly thicker one. As it bakes, the cake becomes moist and slightly dense. A ribbon of cinnamon sugar swirls through the center of the cake, making it not only beautiful, but flavorful. The sharpness of the cinnamon and the sweetness of the sugar counteract perfectly to the lightly sweetened dense cake. Then you get to the crumb topping. Bits are crunchy and sweet, while other bits are soft and moist. You get the crisp of the cooked sugar, and the sharpness of the cinnamon. The butter just blends the flavors together and you have the perfect crumb topping. This cake is seriously to die for. If you don't drink coffee, you will begin to crave it with this amazingly cinammony dense cake. And, if you already love coffee, your coffee moments will be transformed from "ahhhhh" doses to "AHHHHHHHH, OH MY GODDDDDDD" doses. Make this cake. Eat this cake. You will appreciate having to read all this. It is definitely worth it. Enough said.

Ingredients:

Crumb Topping
1 Cup Flour
1 Cup Brown Sugar
2 tsp Ground Cinnamon
1/4 tsp Ground Nutmeg
3/4 Cup Cold Butter (Cubed)

Cinnamon Swirl
1/2 Cup Brown Sugar
1/2 tsp Ground Cinnamon
1/8 tsp Ground Nutmeg

Cake
2 Cups Flour
1 tsp Baking Powder
1 tsp Baking Soda
1/2 tsp Salt
1/2 Cup Butter (Softened)
1 Cup Sugar
2 Eggs
2 tsp Vanilla Extract
1 Cup Full Fat Sour Cream (DO NOT SUBSTITUTE WITH LOW FAT)

Directions:
Preheat the oven to 350 degrees, and butter and flour a tube pan.
Start by combining all of the crumb topping ingredients, except for the butter. Whisk the ingredients together so they are combined. Cut the butter into the crumb mixture as you would if this were a pastry. Use a fork, pastry cutter, or your hands. You are looking for a sand like texture where the butter is incorporated. You do not want chunks of butter. Set aside.
Now mix the cinnamon swirl by just mixing all the ingredients in a small bowl. Set aside.
For the cake, whisk the flour, baking powder, baking soda, and salt in a bowl. In another bowl cream the sugar and butter until pale and fluffy. Add the eggs, one at a time, making sure to mix well in between. Now, add the vanilla extract and mix until just incorporated. Add half of the flour mixture and mix until combined. Next add the sour cream and mix till combined. Add the remaining half of the flour mixture and mix enough to just combine all the ingredients well.
Pour half the batter into the buttered and floured tube pan. The batter will be thick so you may need to spread it with a spoon. Now, evenly sprinkle the cinnamon swirl all over the top of the batter. Pour the other half of the batter on top of the cinnamon swirl and spread evenly. Now, evenly pour the cinnamon crumb mixture on the top of the cake. Bake at 350 degrees for 50-55 minutes, or until a toothpick comes out clean. Cool the pan on a rack until completely cool. Take the cake out of the pan and place on a plate. Generously sprinkle powdered sugar all over the cake. Slice and enjoy. 

Monday, August 19, 2013

Icebox Lazy Cake

Lazy Cake, REALLY Lazy Cake 
Prep. Time: 5 Minutes
Freezing Time: 4-6 Hours
There are these cookies that my mom buys, ones called Maria cookies, and OH MY GOD are they good. They taste good dipped in tea. They taste good with coffee. They are mouthwateringly amazing sandwiching a s'more, so imagine how good they are broken up and smothered in creamy chocolate. Add a stick of butter to that, and you have got the perfect marriage I tell you! That is exactly what lazy cake is. As a kid, I went to private school, and they had fundraisers every other day. Of course, they got a lot of money, but did we ever get the grass playground we were promised? Absolutely not. We do have ugly knee scars, stitched heads, but till now no grass, and even more stupid fundraisers filled with fake tears of joy from the so called "supervisors" of the school. But, then again, there are the good memories. One of those memories is when they had an after school cooking club. Mothers would volunteer to make easy recipes with about 20 younger girls. We had no oven, only a microwave, so it all had to be quick and simple. The day my mom volunteered we made this lazy cake. And man is it lazy. I had a moment similar to that of the cream puffs moment. That moment was filled with desperate need to make this cake and devour it endlessly. Maybe it shouldn't even be called a cake. Technically it is a roll, but then again when it's sliced it resembles cake slices. Frozen, AMAZING cake slices. Of course, when I had an immensely needy chocolate craving the other day, I got up and made this lazy cake. It did have to freeze for a few hours, but until it did, I made do with licking the bowl next to a cup of black coffee. Boy, was it worth it!

Take a bite. You will get crunchy bits of cookies. They are gonna be swimming in a pool of frozen swirled creamy chocolate. It is rich enough to satisfy the chocolate craving, but not too rich where you can't eat more. The fattiness of the butter adds an amazing contrast to the cold frozen feel of the actual cake. The cookies are bland enough to compliment the sweet chocolate. The chocolate mixed with the creamy milk makes it ever so smooth and adds the perfect amount of depth to the light cookies. All together, it is the perfect bite. As perfect as it can possibly get.

Ingredients:

7 tbsp Butter (Melted)
1 14 oz. Can Sweetened Condensed Milk
3/4 Cup Unsweetened Cocoa
1 tbsp Corn Starch (Optional)
2 Packets Le Petit Beurre or similar cookies (200 g. each)

Directions:
Break the cookies into quarters and set aside in a large bowl. In a small bowl, whisk the butter, condensed milk, cocoa, and corn starch. Now, pour the mixture on the cookies and coat all the cookies evenly. Form two logs onto separate pieces of wax paper or greased foil.  Wrap well and freeze for 4-6 hours. Slice and enjoy!

Thursday, August 01, 2013

Cream Puffs

Cream Puffs
Oven Temperature: 400 degrees, 350 degrees
Prep. Time: 40 minutes
Cook Time: 50 minutes
Total: 1 1/2 hours
 
I LOVE Cream Puffs. They are definitely at the top of my long list of favorite desserts. As a kid, my mom used to always make them when guests came over. I was always so excited to see them in the fridge. I had dreams about them. I dreamt that one day I would be able to make them. I would make a lot of them, and I would not share, because sharing is not caring. I would eat them all. I would get fat, but I wouldn't care. Because life was good. Now, I am going to pass this immense amount of knowledge to you. Please use it wisely.
Cream Puffs are made of a choux pastry. This is a light pastry that hollows in the middle as it cooks, making it the perfect candidate for tons of filling! These mini pastries are such a simple and elegant dessert. Taking a look at them you think they are a difficult and gourmet dessert. After you take the first bite, you are positive that they are difficult to make. This light and hollow pastry has a hint of sweetness and is stuffed with mounds of light and fluffy whipped cream. Take a bite and you will be mesmerized. The pastry has a slight crunch and a hint of sweetness. The cream makes the inside slightly and perfectly soggy. The cream will ooze out. You will lick the crumbs. You will lick the extra cream, and you will not be disappointed. I guarantee that you will not be disappointed!

Ingredients:
1 Cup Flour
1 tsp Sugar
1/2 tsp Salt
1/2 Cup Butter (Cubed)
1 Cup Water
4 Eggs
Egg wash (1 Egg blended with a dash of salt, and 1 tbsp Milk)
Whipped Cream . . . LOTS of it!

Directions:
Begin by preheating your oven to 400 degrees. In a bowl, mix together the flour, sugar and salt. Set aside.
In a saucepan, on medium heat, place the cubed butter with the water and bring to a boil. Make sure the water does not boil before the butter melts or else too much will evaporate. As soon as the mixture boils turn off the heat and quickly mix in the flour mixture with a wooden spoon. Once all the flour is incorporated add the first egg. Beat in quickly or the egg will cook from the heat. After the entire egg is incorporated, continue to do the same with the three remaining eggs. As you reach the third egg, the mixture will seem to separate from the egg. Just keep mixing till it's incorporated again.
Line a baking sheet with parchment paper. With a tbsp, measure 24 mounds and place on the baking sheet in a 4x6 format. Brush with the egg wash in order to slightly glaze the cream puffs. Place on the center rack and bake for 15 minutes, until browned. Now lower the oven to 350 degrees and bake for another 20 to 30 minutes. The pastries will be evenly browned all over and the inside should be slightly dry.
After you take them out of the oven, place on a cooling rack. With a toothpick prick the top of each one so the moisture doesn't make the inside soggy again. Cool completely. When cool, split in half and fill with your desired amount of cream. Dust with powdered sugar and place in the refrigerator until ready to serve.
ENJOY, because I sure did, even after the 11th one! 

Saturday, July 27, 2013

Banana Bread

Banana Bread
Oven Temperature: 350 Degrees
Prep. Time: 20 minutes
Cook Time: 70 minutes
Total: 1 1/2 Hours
I am not fond of bananas. I refuse to eat them alone, and am very picky when it comes to baking with them. There are only two things that I will eat with bananas, Peanut Butter and Banana Bread. This Banana Bread is a truly classic recipe. Each bite is moist and flavorful. The bananas are evenly spread throughout and you get a nice bit of texture from the cinnamon coated walnuts. The crisp exterior has a nice bite to it, and the interior is unbelievably moist. This is a great addition to your morning cup of caffeine, and maybe, just maybe, you could pull it off as a dessert!

Ingredients:

1/2 Cup of Butter (Softened)
1 Cup Sugar
2 Eggs
4 Medium VERY Ripe Bananas
1 tsp Milk
1 1/2 tsp Vanilla Extract
2 Cups Flour
1 tsp Baking Soda
1/4 tsp Salt
1 Cup Walnuts (Chopped)
1 tbsp Ground Cinnamon
1/4 tsp Ground Nutmeg

Directions:
Begin by mashing the bananas, and putting them in a bowl. I like to leave a little texture to my bananas, because I enjoy finding a chunk here and there. It's like a moist treasure. You also want to prepare the walnuts. Preheat the oven to 350 degrees. I toast them in the preheated oven for 8 minutes, or until I can smell them. I then allow them to cool and chop 'em up. Then I put them in a bag and add the cinnamon and nutmeg. I dance around a little and make sure they are all coated and then I leave 'em be. Add the milk and vanilla to the bananas and incorporate with a spoon.
In another bowl, mix the flour, baking soda, and salt. Now, in a third bowl cream the butter and sugar until light and fluffy. Add the eggs one at a time beating well between each addition.
Next, with the beater on low, alternate adding the flour mixture and the banana mixture. Don't over mix the batter. Just incorporate everything well. Finally, fold in the walnuts with the extra spices left in the bag.
Butter and flour a 9x5x3 inch loaf pan and evenly our the batter into the pan. Bake for 60-75 minutes or until a toothpick comes out almost clean. Cool in the pan for 5 minutes and then flip onto a wire rack. Cool completely. Store in an airtight bag. You can also freeze this. Just wrap it in some foil, an airtight bag, and pop it into the freezer for up to six months!

I hope you all enjoy this recipe as much as I did!

Wednesday, July 24, 2013

Cinnamon Rolls


To DIE for Cinnamon Rolls
Oven Temperature: 375 Degrees
Prep. Time: 1 Day
Cook Time: 20 minutes
Total: 2 Days
Hey Everyone! For my first post I want to share a recipe that is very close to my heart. It is a recipe that truly defines me through my style of cooking. I have a ridiculous sweet tooth, and this recipe seems to be able to satisfy it, even if it is just temporarily! These cinnamon rolls are fluffy. From the beginning they rise into fluffy pillow like rolls. As they bake you will literally drool next to the oven from the wonderful aroma they let out. They come out of the oven, bubbling with yumminess. As you spread the frosting onto these warm rolls, it is sucked in leaving a glossy shine to the top of each roll. The cinnamon sugar coating will drip out into this elastic heaven as you pull each roll out. And then you take a bite. That bite. That bite. As you put it in your mouth you feel the heat cooling down. The dough, it has the perfect balance of elasticity to fluff. Then you reach the cinnamon sugar. The butter coats each individual sugar crystal and you taste the sharpness of the cinnamon. And the frosting, don't forget the frosting. It sweet, it's cheesy, but wait . . . It's tart. You taste the slightest hint of lemon and the pure vanilla. The frosting is so light. It is so fluffy. The entire thing is a perfect marriage. And that was just the first bite!

Ingredients:

Rolls
1 tbsp Yeast
1/4 Cup Warm Water
3 Eggs
1/2 Cup Sugar (Separate 1 tsp)
3/4 tsp Salt
1/2 Cup Butter
3/4 Cup Milk
4 1/2 - 5 Cups Flour

Filling
1/3 Cup Butter (Softened)
1 cup Brown Sugar
3 tbsp Ground Cinnamon

Frosting
6 oz. Cream Cheese (Softened)
1/2 Cup Butter (Softened)
3 Cups Confectioners Sugar
1 tsp Vanilla Extract
1/4 tsp Salt
1/4 tsp Lemon Juice
1 tsp Lemon Zest

Directions:
Begin by whisking the yeast and 1 tsp sugar into the warm water. Make sure the water is not warmer than 110 degrees or you will kill the yeast! Set the yeast mixture aside.
Grab a bowl. Crack the eggs and add the sugar. With a paddle attachment or a hand mixer, begin beating immediately. Sugar will cook the eggs if it sits on them without being beat into them. As your mixture is being beat, add the salt. Mix them real good. Like you mean it.
Now, in a small saucepan melt the butter. As soon as it is melted and starting to boil, add the milk and take it off the heat. If your mixture is not taken off the heat it will be too hot and kill the yeast. And you don't want your yeast dead.
With the mixer on low add the butter and milk mixture to the egg mixture. Mix it well and then add the dissolved yeast. Mix again.
Add the flour, one cup at a time. Mix well between each addition. When you reach the fourth cup of flour let the mixer run on medium speed for 4 minutes. Now you will determine how much more flour to add. I always use 4/12 cups of flour. You can use five if you feel it is too sticky, but I don't recommend it. NEVER ADD MORE THAN FIVE CUPS OF FLOUR. NEVER, because your dough needs to be sticky and not stiff.
Now scrape all the dough into a big ball. Place it into a greased bowl. Wrap the bowl and refrigerate the dough over night. Watch a movie, call a friend, get some sleep.
The next day, take the dough out of the fridge and place it on a clean and floured surface. Pat the dough down into and even rectangle and begin to roll out into a rectangle. Roll into a 16x21 inch rectangle. Make sure the dough is not too thick. 1/4 inch is sufficient. 
After the dough is rolled, take the creamy softened butter and spread evenly over the entire rectangle. Leave an inch of uncovered dough hot dog style. Now, take the brown sugar and crumble evenly to coat the butter. Take the cinnamon, and generously sprinkle over the brown sugar.
Here comes the rolling! Start to roll the cinnamon rolls. Roll it tightly, but not too tightly, but tight enough. You get the idea. Seal the roll by putting water on the clean inch of dough. Rotate the dough so the sealed edge is touching your work surface.
With a serrated knife, and using a back and forth sawing motion, slice the roll in half. Now slice each roll in half again. Slice each quarter into 3 different 1 inch rolls. You should get 12 rolls. Lightly butter a 9x13 inch pan and sprinkle cinnamon all over the bottom. Align the rolls in the pan. Cover with plastic wrap. and set aside for 2-3 hours to allow them to rise and double in size.
When you are ready to bake the rolls, preheat the oven to 375 degrees. Place the pan in the center rack and set the timer for 15 minutes. While the rolls are baking make the frosting. Beat the cream cheese and softened butter together until smooth. Add the sugar, vanilla, lemon juice, salt, and zest.  Beat for 10 minutes on high speed. Check on the rolls. Bake them until they are evenly browned. As soon as the rolls come out of the oven, smother them with a generous amount of frosting.

Now comes the best part! EAT and ENJOY!